Friday, December 25, 2009
Merry Christmas!
Merry Christmas one and all! I know things have been a little quiet on the blog front lately...I haven't had any cakes to do, and thanks to a string of minor health problems I didn't get around to doing the flower-making practise I had planned. At least my toe is getting better now, and I'm just about over a fairly nasty cold, so hopefully once the Christmas "silly season" is over I can get back into it. Have a wonderful Christmas Day, and best wishes for 2010.
Wednesday, December 16, 2009
Ouch!
Last night was the last session of my final class for the year, but unfortunately I didn't make it. I've had a long-running problem with an infection in the nail bed of my right big toe that flatly refused to heal, and I ended up having to have the nail pulled out. That spelled the end of any further snow globe attempts, not to mention that I didn't even start decorating the cake that the snowglobe, if I'd managed to make a decent one, would have been put on.
A bit of a disappointing end to the year... I never got around to trying the patchwork again either, so I guess I did end up throwing my hands in the air and writing off the rest of the course. But on the plus side, course information for next term is up on the Hunter Community College web site, and I'm doing another four classes in February and March. I don't have any cake jobs on at the moment either (which isn't a bad thing with my toe still being a tad sore), so I'm looking at spending some time working on flower making. First job is to refine my rose technique, then I'll probably practise making the lilies and frangipanis that we did in the last class.
A bit of a disappointing end to the year... I never got around to trying the patchwork again either, so I guess I did end up throwing my hands in the air and writing off the rest of the course. But on the plus side, course information for next term is up on the Hunter Community College web site, and I'm doing another four classes in February and March. I don't have any cake jobs on at the moment either (which isn't a bad thing with my toe still being a tad sore), so I'm looking at spending some time working on flower making. First job is to refine my rose technique, then I'll probably practise making the lilies and frangipanis that we did in the last class.
Thursday, December 10, 2009
Third "Christmas & More" Class
I wasn't too impressed with Tuesday night's class... I'm re-doing pretty much everything we did at home. We started making our gelatine snow-globes for next week, then did plaques with patchwork cutters. My gelatine wouldn't dissolve and was full of lumps and bubbles, and I had a shocker with the patchwork. After a trip to Cupid's yesterday, I re-made my snow-globe (still took 3 attempts and wasted a lot of gelatine), and I bought a plaque cutter and the "Santa, Sleigh & Reindeer" patchwork cutter. The plaques that Marilyn made for us to work on in class weren't what you'd call impressive, and after looking at the Patchwork Cutter web site myself, I found that she hadn't even taught us the proper techniques for using them. I was tempted to throw my hands in the air and write off the rest of this course, but for my own peace of mind, I need to re-do the things we were meant to do to prove to myself that I can do it.
Sunday, December 6, 2009
For Joanne

Thursday, December 3, 2009
Second "Christmas & More" Class

Wednesday, December 2, 2009
Happy Birthday To Me!

Monday, November 30, 2009
Friday, November 27, 2009
First "Christmas & More" Class
Oops... slacking off again. I still haven't written up the post about my finished Christmas cake, I went to the Cake Decorators Association Christmas party last Saturday, I've been working on two cakes this week, and I started another course on Tuesday night. Maybe that's why I haven't been blogging, just too darned busy! Still thinking about making myself a birthday cake next week, but I don't have any more cakes on the horizon after that, so I may get back to doing some writing soon.
Thursday, November 19, 2009
Fourth & Final Christmas Cake Class
Last Tuesday evening was the final session of the Novelty Christmas Cake class, although I was one of very few that actually had a finished cake at the end of the night. This course wasn’t as “structured” as the beginner class, where everyone took home a completed cake at the end of the last session. Many of the others were at various stages of modelling and still needing to cover cakes, but after putting in quite a bit of work at home to get all of my modelling done, all I had left to do in class was put my cake together.

So here it is, my finished Santa Sleigh! I used royal icing to glue on the sleigh sides and position Santa on the front of the cake and sack on the top part. I then arranged the presents around him and glued them in place, and scattered the candy canes on top of them. Unfortunately, I left a few bits of royal icing visible where I didn’t get the position quite right the first time, and I didn’t realise it was there until it was dry.

The only other hiccup for the night was that I snapped off one of Rudolph’s antlers. The modelling paste still wasn’t dry and his hooves had stuck to the bottom of the container I’d used to take him to class… I was trying to ease him out as gently as I could, but when it gave way I bumped his head against the side of the container, and SNAP!!! I was so devastated, after all that work… I had a bit of a melt-down, but managed to fix it. It took a bit of time, but I just used my craft knife to dig the busted-off end out of his head and carve the slot a little bigger so I could glue the main part back in. So if Rudolph’s antlers look a little uneven, that would be why!

I glued Rudolph to the board and attached the ribbon reins to Santa’s hands with a little more royal icing, and my cake was finished. As with the beginner class, Marilyn was very impressed with my effort and asked me if I’d made it for someone, but it was only ever going to be my family’s Christmas cake and another photo for my portfolio. I was just having fun with the modelling and wanted to see how impressive a cake I could come up with… and I must say, I’m quite happy with the result!
Tuesday, November 17, 2009
Cake & Board
Phew... I've just finished covering and icing my cake and board, and I finally have everything ready so I can put my Christmas cake together in class tonight. I didn't mean to cut it this fine, but at least it's all done now. I made a six inch square cake using the "light fruit cake" recipe in my book, but have a bad feeling that there may have been a misprint. The quantity for one tin size smaller had 2 eggs, the one I made had 4 eggs, and the next size up only had 4 eggs too. I know fruit cakes are meant to be moist, but this one seems TOO moist, especially since I've made this recipe in the eight inch round size for my Beginner Class cake and it wasn't soggy like this one seems to be. I'm wondering if the one I made was only supposed to have 3 eggs... anyway, what's done is done, and I sure as hell don't have time to make another one now!

Yesterday I trimmed a slice off each side and used those pieces to shape the "step" the back of the sleigh. I covered the cake with marzipan, which was a bit tricky with the odd-shaped cake (especially the high part at the back, where it kept tearing at the edges under its own weight), so it was basically matter of "get it on there any way you can." The fondant, which was freshly made and still had all its "spring" and elasticity, went on quite a bit easier. It's not perfectly smooth, but not too bad a job for an odd-shaped cake, and most of it will be covered with models and decorations anyway.
For the snow effect, I covered the board with white fondant and then went over the top of it with royal icing. I spread the icing on roughly, then dabbed all over it with the spatula to make rough peaks. Finally, while the icing was still wet, I sprinkled the board fairly heavily with ordinary white sugar to give it a bit of a sparkly "ice crystal" effect. So all that's left to do now is to pack up my models and gear, and pray that it doesn't rain tonight!
Sunday, November 15, 2009
Santa & Rudolph
Poor Rudolph... he was the first model I started working on, and the last one finished. He's been all-but-finished for ages, waiting patiently for me to get off my butt and go down the street to get some ribbon to use for the sleigh reigns. All I had to do last night was glue on the ribbon and stick on some holly cut-outs to cover the join, and Rudolph is ready for action. Santa has been finished for a while too, and for my first attempt at modelling a person, I'm really happy with how well he turned out.

All-in-all, I've really enjoyed the modelling, which is pretty much what this class was all about learning. I just need to bake my cake now. Speaking of needing to get off my butt, I really have to get the cake done this afternoon to give myself time to cover it in marzipan and fondant. I also went to the hardware shop yesterday and got some MDF cut for my board, which I need to cover with contact and fondant as well. I've finished all the modelling, but I still have a busy few days coming up to have everything ready to put together on Tuesday night!

All-in-all, I've really enjoyed the modelling, which is pretty much what this class was all about learning. I just need to bake my cake now. Speaking of needing to get off my butt, I really have to get the cake done this afternoon to give myself time to cover it in marzipan and fondant. I also went to the hardware shop yesterday and got some MDF cut for my board, which I need to cover with contact and fondant as well. I've finished all the modelling, but I still have a busy few days coming up to have everything ready to put together on Tuesday night!
Saturday, November 14, 2009
Christmas Cupcakes
This morning I did another one-off three hour class, a Christmas Cupcake workshop. These were fun to make! Santa and the Snowman were made by sticking a marshmallow on top of a cupcake with ganache and then covering the whole lot with fondant. We then used more fondant to model hats and facial features. We did the snowman first... Marilyn happened to pick up my red-cased cupcake to demonstrate putting on the marshmallow, and half the class had done the same before she remembered that the red ones were supposed to be for Santa. D'oh! Ah well... it looks like he's decided to break the mould and wear green pants this year.

We also had a small cake baked in a tartlet case and a bigger muffin that we could decorate any way we liked. I went for good old-fashioned holly on the small cake, which actually turned out looking a bit like a miniature Christmas pudding. To make the Christmas tree I used a marshmallow again, this time with a sausage of fondant around the join between muffin and marshmallow and a little peak on top of the marshmallow to build up more of a cone shape. I covered the whole thing with green fondant, and put on silver cashous and little balls of red and white fondant for decorations, and cut out a star with a small cutter.

We also had a small cake baked in a tartlet case and a bigger muffin that we could decorate any way we liked. I went for good old-fashioned holly on the small cake, which actually turned out looking a bit like a miniature Christmas pudding. To make the Christmas tree I used a marshmallow again, this time with a sausage of fondant around the join between muffin and marshmallow and a little peak on top of the marshmallow to build up more of a cone shape. I covered the whole thing with green fondant, and put on silver cashous and little balls of red and white fondant for decorations, and cut out a star with a small cutter.
Friday, November 13, 2009
Sack & Presents
Last night I added ribbons and bows to the presents I made in class this week, and I painted the trimmings today. I didn't end up putting bows on all of them as they were quite fiddly, and I'm running out of time to get my models done, so I decided to just spend one night on it and whatever I got done was a bonus. Later on I actually thought of a good reason to not have bows on all of them... they would get in the way if I need to stack the presents on the cake.

Thursday, November 12, 2009
Sleigh Sides
I made good use of the pasta maker again to do the sleigh runners (I did actually make fettucine once, but the pasta maker has certainly had far more use as a cake decorating tool!). I marbled three slightly different browns, rolled out the marbled paste, and put it through the spaghetti cutter. Then I took six strands at a time and rolled, twisted and squashed them back together to make a rough wood grain effect. Unfortunately the marbling blended back together more than I was expecting, so you wouldn't really notice the different shades much unless you looked at it closely.
I was going to do a similar thing with yellow paste to do the gold rope trim, twisting a few strands evenly rather than crushing them together. It didn't quite go according to plan... the paste may have been a bit sticky, as the strands were coming out very roughly cut and I couldn't make a long enough neat rope. After a bit of experimenting I ended up hand-modelling the rope trim by stretching the paste into a thin sausage, twisting it as I went. I'd already cut out the holly leaves and berries from rolled out flower paste, so they just had to be glued on.

Next came the painting. I did the brown wash on the bottom section before the trimmings went on, as I thought it might need something to break up all the white. I painted the rope with gold lustre dust, and the holly with gel colours mixed in alcohol. The gold lustre actually darkened the rope trim quite a bit, and it ended up a similar depth of colour to the sleigh runners. So now the sleigh runners had to be painted too... as usual, making things up as I go along. I mixed a bit of black with the chestnut to make a darker brown. It worked really well! The colour pooled in the grooves between spaghetti strands which enhaced the wood grain effect, and the darker wash over the marbling helped give it the mottled look that I'd originally wanted. Yeah... dark wash over light marbling... I'll pretend that's what I meant to do all along!
Wednesday, November 11, 2009
Third Christmas Cake Class
Marilyn didn't actually have a picture to show us of the cake we're making in this class, so we've really been flying blind the whole time. I've had a picture in my mind of how I thought it would look based on the shape of the sleigh sides... but when I listened to Marilyn describe how to cut and arrange the cake, her description didn't seem to match my vision, and I could never quite get a handle on how she wanted us to do it. We were supposed to cover our cakes last night, but because of the uncertainty, I decided to just observe. Not to mention that as I discovered in the beginner class, that classroom and white fondant don't mix... damn dust!
The cut-out sides for the sleigh are low at the front and high at the back, so I've been picturing Santa sitting on the low front part of the cake and putting his sack on the higher "step" at the back, then stacking presents and toys around him. But the way Marilyn showed us last night is to have the high part at the front (so the cake is sticking up above the cut-outs) with Santa perched on top, and the low part at the back creates a hollow to fill up with presents. To me it looked back-to-front and horribly wrong... sorry Marilyn, no offence, but I'm sticking with my own plan.
So we were supposed to be covering cakes and making Santas last night, but I didn't want to cover my cake in class and I've already made my Santa. I just took my gel colours with me and made little presents to go in the sleigh... something nice and simple! I had the hassles with my paste, which need a quick zap in the microwave if I had to knead a big piece, so I figured it would be easier for me to make my Santa at home. Plus I like the Santa picture and instructions in my own cake decorating book, and I felt I could do a better job at home where I could take my time and let pieces dry between stages.
Monday, November 9, 2009
Modelling
After the 'useless paste' disaster in my class, I've finally managed to get some modelling done in the last few days. The paste still took a bit more modification, but at least now I've made some decent progress. I tried warming it in the microwave to make it easier to knead, and then I added some glycerine, which I'd hoped would soften it. It seems to have worked, but if I'm starting with a large piece of paste, I still need to warm it in the microwave again to make it workable.
Rudolph was first cab off the rank. I had a picture of a fairly caricaturish reindeer that I found somewhere-or-other on the net that I was trying to sort-of copy, at least for the basic body shape, anyway. He's turned out to be a fairly crudely modelled, generic looking animal with a red nose, but at least the pre-made antlers worked well. I cut them out of rolled-our flower paste and let them dry so I could just make slots in his head and poke them in. The antlers are about the only feature distinctive enough to make it actually look like he's supposed to be a reindeer!
I had a much happier time making my Santa than I'd thought I would. For my first modelled person, I think I've done a pretty good job! The only thing I really got wrong is that I made the head too small in proportion to the hands and body, but thankfully it's Santa, so I figured I can pad out the head with his hair, beard and hat. He just needs a hat now and he'll be finished, and Rudolph only needs to have his harness painted with gold lustre and another couple of trimmings and he'll be ready for action too. I'll hold off with the photos until they're finished.
I've also adapted the sketch I made of Marilyn's chocolate mould to suit the shape of my sleigh cut-outs, which I hope to start working on tonight. I still need to make a sack, some presents, and hopefully some toys and candy canes if I get time. Oh, and cover a board... and bake, cut, shape and cover a cake. Still so much to do, less than two weeks until I need to have everything ready to put together!
Wednesday, November 4, 2009
Second Christmas Cake Class
Once again, I didn't have a very productive night at my class last night. No headaches this week, at least not in the literal sense... my biggest headache was that my modelling paste was barely workable. I made up modelling paste according to the recipe in my book, but Marilyn thought it seemed way too stiff. I added copha to it, I kneaded more fondant into it, I added 'slip' (a sugar paste conditioner that I got from Cupid's), but still couldn't get it soft and/or smooth enough to work with. I don't think the weather helped either... it was a very hot day and I think that having the ceiling fans on in the classroom kept drying out the surface of the paste too quickly. I was trying to make a reindeer, but by the end of the night, all I had to show for two hours' work was a blob of too-stiff chestnut brown paste. Looks like I'll be doing some some heavy-duty modelling at home this week.
Monday, November 2, 2009
Children's Birthday Cakes
Last Saturday I did a Children's Birthday Cakes class, a single three hour workshop like the cupcakes and chocolate ones I did last term. We had a choice of making a butterfly or a snake, both of which could be easily made by cutting and rearranging a round cake. We had to take our own lollies and whatever bits and pieces we wanted for decorating, but once again, the joy of classes... it's bit hard to know what to take when you don't know exactly what you're going to be doing.
 I went with the butterfly, and while I was fairly happy with the shape, I could have done a better job with the design. I usually spend hours planning any given cake, and more often than not, the design goes through several incarnations before I settle on a final design. Coming up with something on the spot is definitely not one of my strengths! Anyhow, the best tip I picked up was how to do a smooth finish on frosting or buttercream (I was wondering about this WAY back when I made Cameron's Bob the Builder cake)... use a hot spatula to smooth it over! It didn't really work in the class because the taps didn't run hot enough, but I'll definitely try it next time I use buttercream at home.
 I went with the butterfly, and while I was fairly happy with the shape, I could have done a better job with the design. I usually spend hours planning any given cake, and more often than not, the design goes through several incarnations before I settle on a final design. Coming up with something on the spot is definitely not one of my strengths! Anyhow, the best tip I picked up was how to do a smooth finish on frosting or buttercream (I was wondering about this WAY back when I made Cameron's Bob the Builder cake)... use a hot spatula to smooth it over! It didn't really work in the class because the taps didn't run hot enough, but I'll definitely try it next time I use buttercream at home.
Wednesday, October 28, 2009
First Christmas Cake Class
Last night I had my first session of a Novelty Christmas Cake class, but unfortunately it wasn’t an overly productive night for me as I had a splitting headache for most of the time. The cake we are making is a sleigh, and last night we made cut-outs for the sides. If I’d known exactly what we’d be doing I would have taken my big rolling pin. I went along with basically all the gear I have for flower making and modelling, only to find out we were making what are basically big ‘plaques’ for the sleigh sides. Rolling out huge pieces of flower paste to almost A4-size with my little modelling rolling pin wasn’t fun. Ah well, classes are great to do but it’s a bit of a bugger not having all your own gear on hand.
 This is one of my two sleigh sides. I just couldn’t get the thickness anywhere near even with my little rolling pin, but today it dawned on me… turn them over so the side that was pressed flat against the board is facing up! Much better. Marilyn had some textured rolling pins, cutters, embossers and other bits and pieces for us to decorate them with, but the design idea that I worked out actually came from a sleigh on one of the chocolate moulds she’d taken. A vision formed in my mind of what I want to do, but not having my gel colours or pasta maker with me, there really wasn’t anything I could do beyond cutting out my sleigh shapes. Anyway I’m out of cellogen too, so I guess I won’t be doing much more of anything at home either until I make another trip to Cupid’s.
 This is one of my two sleigh sides. I just couldn’t get the thickness anywhere near even with my little rolling pin, but today it dawned on me… turn them over so the side that was pressed flat against the board is facing up! Much better. Marilyn had some textured rolling pins, cutters, embossers and other bits and pieces for us to decorate them with, but the design idea that I worked out actually came from a sleigh on one of the chocolate moulds she’d taken. A vision formed in my mind of what I want to do, but not having my gel colours or pasta maker with me, there really wasn’t anything I could do beyond cutting out my sleigh shapes. Anyway I’m out of cellogen too, so I guess I won’t be doing much more of anything at home either until I make another trip to Cupid’s.
Sunday, October 25, 2009
General Update
Now that I’m briefly between major cake projects I keep remembering all sorts of little bits and pieces that I’ve forgotten to mention along the way, so I’m going to sit down and rack my brains for a bit and see how many I can come up with. A pretty major one is that I’m now a member of the Cake Decorators Association of NSW, and I went to my first meeting last weekend. We had two visitors doing demonstrations; one did lisianthus and the other did cattleya orchids. It was nice to see something other than roses being done, because apart from the little filler blossoms, I haven’t tried to make any other type of flower yet.
I’m also doing another four Hunter Community College classes this term. I start the first one this week (four Tuesday evenings again) which is to make a novelty Christmas cake, then the one after is called Christmas & More (the next four Tuesday evenings, so eight weeks in total). Next Saturday morning is a one-off Children’s Birthday Cakes class, and two weeks after that is another Saturday morning for Christmas Cupcakes. Thankfully I don’t need too much more equipment for these ones, now that I already have the basics from doing the beginner class.
I’ve also stepped up my job hunting effort due to a change in family circumstances, and I am now looking to get into a Pastry Chef apprenticeship next year if possible. I applied for a job at a café in Hamilton this week, but again, no luck. The job title was ‘Baker/Pastry Chef/Cake Decorator’ and said they were willing to take someone wanting to start an apprenticeship, so would you not assume that they wanted an apprentice pastry chef? Apparently not… it seems like they actually want an apprentice chef that can do their cakes and pastries and then go off and do other stuff elsewhere in the kitchen as well, so I was turned down because I want to do the Patisserie certificate, not the Commercial Cookery one that apprentice chefs do. Having said that, the lady I spoke to about the job was very impressed with my application, and she even suggested a few places to send resumes to that would be better suited to the kind of work I want to do.
In the meantime, I’ve made up another batch of flower paste and I’m starting to work on making some rose sprays to (hopefully) sell. I decided to give the recipe in my book another chance, in case the problems I had with the batch from Mum and Dad’s cake had something to do with the way I made it up. I don’t have a saucepan small enough to sit my little bowl over to warm the gelatine, so last time I just boiled the kettle and sat it in another bowl of hot water. Since then I came up with the idea of sitting my gelatine bowl in the steamer over a saucepan, which worked much better for melting the gelatine and combing it properly with the glucose and copha. I also added the icing sugar to the wet ingredients rather than the other way around, so there was no loss in transfer this time (the chemist in me rears its head once more!).
A hint from one of the demonstrators at the Association meeting was to not add all of the icing sugar at the time of making so you have a bit of leeway later. This is especially handy if you need to colour the paste... if you’ve already made it up to the right consistency and then have to knead in colourings, you still have to keep adding more icing sugar as you knead to stop it sticking, and it could end up too dry. So far this batch of paste looks much smoother and softer than my last effort.
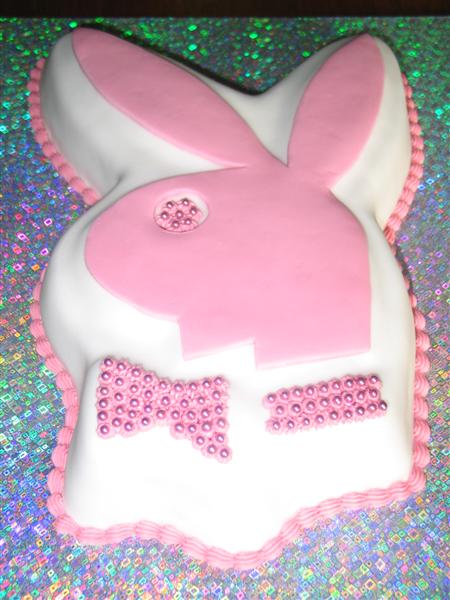
So at the moment I’m looking for work, about to start more classes, making roses to sell, and apart from the Christmas cake in the class that starts this week, my next big project (unless something else comes up sooner) will be a Playboy Bunny cake for my sister-in-law-to-be Amie’s birthday party at the end of November, and then my birthday is the week after hers… I’ve been wanting to try a Gift Box cake ever since I took up decorating, so I think I might just make myself one for my own birthday!
I’m also doing another four Hunter Community College classes this term. I start the first one this week (four Tuesday evenings again) which is to make a novelty Christmas cake, then the one after is called Christmas & More (the next four Tuesday evenings, so eight weeks in total). Next Saturday morning is a one-off Children’s Birthday Cakes class, and two weeks after that is another Saturday morning for Christmas Cupcakes. Thankfully I don’t need too much more equipment for these ones, now that I already have the basics from doing the beginner class.
I’ve also stepped up my job hunting effort due to a change in family circumstances, and I am now looking to get into a Pastry Chef apprenticeship next year if possible. I applied for a job at a café in Hamilton this week, but again, no luck. The job title was ‘Baker/Pastry Chef/Cake Decorator’ and said they were willing to take someone wanting to start an apprenticeship, so would you not assume that they wanted an apprentice pastry chef? Apparently not… it seems like they actually want an apprentice chef that can do their cakes and pastries and then go off and do other stuff elsewhere in the kitchen as well, so I was turned down because I want to do the Patisserie certificate, not the Commercial Cookery one that apprentice chefs do. Having said that, the lady I spoke to about the job was very impressed with my application, and she even suggested a few places to send resumes to that would be better suited to the kind of work I want to do.
In the meantime, I’ve made up another batch of flower paste and I’m starting to work on making some rose sprays to (hopefully) sell. I decided to give the recipe in my book another chance, in case the problems I had with the batch from Mum and Dad’s cake had something to do with the way I made it up. I don’t have a saucepan small enough to sit my little bowl over to warm the gelatine, so last time I just boiled the kettle and sat it in another bowl of hot water. Since then I came up with the idea of sitting my gelatine bowl in the steamer over a saucepan, which worked much better for melting the gelatine and combing it properly with the glucose and copha. I also added the icing sugar to the wet ingredients rather than the other way around, so there was no loss in transfer this time (the chemist in me rears its head once more!).
A hint from one of the demonstrators at the Association meeting was to not add all of the icing sugar at the time of making so you have a bit of leeway later. This is especially handy if you need to colour the paste... if you’ve already made it up to the right consistency and then have to knead in colourings, you still have to keep adding more icing sugar as you knead to stop it sticking, and it could end up too dry. So far this batch of paste looks much smoother and softer than my last effort.
So at the moment I’m looking for work, about to start more classes, making roses to sell, and apart from the Christmas cake in the class that starts this week, my next big project (unless something else comes up sooner) will be a Playboy Bunny cake for my sister-in-law-to-be Amie’s birthday party at the end of November, and then my birthday is the week after hers… I’ve been wanting to try a Gift Box cake ever since I took up decorating, so I think I might just make myself one for my own birthday!
Tuesday, October 20, 2009
Ruby Anniversary Cake
Hurrah! I’ve stopped and started on this cake more times than I can remember, but it’s finally finished. The decoration isn’t exactly what I’d originally planned to do on it, but thankfully it’s a cake that I offered to make and didn’t have to be made to an specific design, although the main design elements were loosely based on Mum and Dad’s own wedding cake.
 I definitely need to find out how to properly wire a crescent-shaped spray before I try to do another cake like this. The final challenge was trying to get the two trailing sprays to sit on top of the cake and look like a crescent. I kept having to add more and more fondant underneath them trying to get them to 'sit right', and I’m still not confident that they are attached properly.
 All in all, another cake decorating story draw to it’s conclusion with a happy-enough ending. I use that expression a lot, that I’m ‘happy enough’ with something… basically it means that I know it’s not the world’s greatest job, but I’ve done reasonably well for a beginner.
Back On Track
After a fairly disastrous week, I finally got myself back on track by Sunday night. I made a mess of everything I touched that afternoon, so I hoped that I might have a happier time making up the flower spray rather than doing the piping. Out of all things cake decorating that I’ve learned or tried so far, making and arranging the flowers has been my favourite part of the process.
So this is the cake topper I made… white roses, white filler blossoms, and loops of red ribbon. It’s actually two separate trails (the only type of spray I know how to do at this point!) designed to curve around and meet in the middle, because I’m not sure how to make a crescent. Hopefully the roses will still hide the two thick chunks of wire that cross in the middle once it goes on the cake!
 I felt much better for having finally made some positive progress after doing the flowers, so on Monday I was ready to tackle the piping. I’m still struggling to master script writing… why is it that when I try to loop around the top curve of a letter, the icing always does this funny ‘corkscrew’ thing as it comes out of the nozzle? It seems to have a mind of it’s own, and it always wants to curve the opposite direction to where it’s supposed to go.
 Anyway, after a few practise runs I managed to do a half-reasonable job. I still only have the basic Wilton gel colours, so I coloured the icing with a fair amount of red, a tiny bit of black to darken it, and a touch of blue to bring it to more of a burgundy-red. The colour actually turned out to be quite a good match for the Claret Wine lustre dust.
 I painted over the piping with the lustre mixed in a little alcohol. The effect was more subtle than I was expecting, and it really only showed up in the photo if I used the flash. I’m not sure if someone that isn’t familiar with cake decorating and doesn’t know that royal icing normally gives a flat colour would even notice it, but I still think it gives the cake a much nicer touch of ‘ruby’ rather than just being a flat red.
A Forgettable Week
Whoops! I didn't realise how long it had been since I last updated my blog, but looking back now, everything did kind of turn to crap after the day of my last post. I missed out on the Donut King job, and the kids have been sick, amongst other things that I'd rather not go into. Let's just say it hasn't been a good week, and I struggled to find motivation to do anything at all, let alone work on Mum & Dad's cake.
When the lady from Donut King called me about my application, it almost sounded as though the interview was a formality. Then the interview on the Saturday morning went really well and seemed so positive and promising, it honestly felt like they all but gave me the job on the spot. So I went home and waited... and waited... and waited... and by Sunday afternoon I still hadn't heard anything back, and I was starting to feel physically sick with worry.
I ended up calling them, and was shattered to find out they'd decided to give the job to someone else. Whether they meant to or not, they had me believing that I had the job in the bag, so I just have no idea what changed. I thought I was going to get my big break into the baking and decorating industry, but instead I'm still just a stay-home mum dabbling in cake decorating. I was so crushed, it took me about a week to get over the anger and disappointment. Having a pair of sick and whingy kids to look after as well during that time, it wasn't a very productive week.
Nevertheless, I still managed to slowly make progress on Mum & Dad's anniversary cake. I made marzipan and covered the cake on the Saturday night (while still on a high after the afore-mentioned promising interview). Then came that fateful Sunday, which was actually my parents 40th wedding anniversary, and I couldn't have possibly been any further from the right frame of mind for cake decorating. Last Tuesday, despite still not feeling remotely like doing it, I forced myself to make and apply the fondant. On Wednesday I did the shell piping around the bottom edge.
Thursday was a really bad day for reasons I'd rather not go into, and cake progress stalled once again. Nothing else got done until Sunday afternoon, when Daddy took the kids to Grandma's for a few hours so I could have a bit of peace and quiet. Not that I actually made much progress, after all that, once I found out the hard way that my home-made fondant loses its elasticity over time. It had gone so crumbly that it couldn't even be rolled without breaking, and no amount of kneading could bring back any sort of pliability, so that spelled the end of the draping that I'd planned to do on the sides of the cake.
At this point I had a major throw-my-hands-in-the-air "I wish I'd never offered to make this cake!" moment. I was feeling so bogged down by it, I just wanted get some sort of decoration finished so I could get it out of my kitchen and out of my life. I couldn't think of anything else off the top of my head to do instead of the draping, so I abandoned doing anything on the sides and just stuck the roses in the bottom corners.
I didn't want to waste the time I had with the house to myself, so I moved on to the piping. As with Terese's graduation cake, I'm still not confident with writing, so I tried the piping gel again. Since the way I did it for Terese's cake didn't work, this time I piped the gel onto the pattern and tried to stamp it on the cake. And this time, of course, there was too much gel, and it slipped and smudged all over the place. Well, I guess it's my own fault for doing these things straight onto a cake without doing a practise run first.
Saturday, October 10, 2009
Graduation Day
My best friend completed her Master of Science degree earlier this year, and the Monday before last, her husband called me and asked if I could do a cake for her graduation dinner. His only requests were that it be a white chocolate mud cake (her favourite) and to cover it in the topaz-yellow colour of her faculty. The rest of the decoration was left up to me. It was also a surprise for Terese, hence there being no mention of it until after the event, despite how excited I was about being offered my first paid cake decorating job!
After doing a bit of searching on the net for graduation cake pictures, I decided to try my hand at modelling and make a graduation cap and certificate from modelling paste. I don’t think I’ve mentioned before that when I made my roses I’ve actually been rolling out my flower paste with a pasta maker (I love it, perfectly uniform thickness petals every time!), and it came in handy for these ornaments too.
 For the cap, I hand-moulded a chunk of black modelling paste into a hemisphere and pinched out corners at the bottom. For the board on the cap, I cut a square from rolled out black paste, and I used the pasta maker’s spaghetti attachment to make strands of black paste for the tassle. To make the certificate I cut a rectangle from rolled out ivory paste, thinned and softened the edges with a ball tool, and rolled it up. The ribbon was made from strips of rolled out red paste.
The black modelling paste didn’t really look a proper black-black, so I painted it with a little black gel colour mixed in alcohol. I’d bought some Claret Wine lustre dust to use on my parents Ruby Anniversary cake, so since I had it there, I thought I might as well use some on the certificate ribbon as well. I painted the ribbon with lustre mixed in alcohol, and it looked fantastic… then I promptly went and dropped it on the floor the next morning. So yes, if the scroll looks a little different in the second picture, that would be because I had to remake it. I also used the fettucine attachment to cut the ribbon the second time around, and it turned out even better than the first one anyway!
Finding the right colour for the fondant was (pardon the pun) a piece of cake… Rohan has a Bachelor of Science degree, and he wore the same colour at his own graduation as Terese did for hers, so he pulled out his graduation photo for me to use as a colour reference. The colour was easy enough to mix from a combination of the Wilton yellow and ivory gels. I did a reasonable job of covering the cake… a few tell-tale finger marks that I just couldn’t smooth out still scream “BEGINNER!” but for my first square cake, and only my second fondant covered cake ever, not too bad. A trim of black ribbon around the bottom added to the ‘tailored’ look of the cake.
Then came the piping… still my least favoured part of the decorating process. I found a fairly casual script-ish font and made up the template in Word. I'd bought some piping gel after I stumbled across instructions on the net for how to use it to transfer designs onto a cake. The example was an outline for a fairly large picture, but I figured it should work for lettering as well. So I put my template in a plastic sleeve, flipped it over, painstakingly brushed over the back of lettering with piping gel, and laid it on the cake… only to have so little of the gel actually stay on the cake that I had barely any outline to follow.
There was nothing else I could do but quickly mix up some black icing and get the piping done while there was still enough natural light to see the vague outline. Unfortunately it was a fairly shoddy job, but at least it was for a good friend that came to be knowing I’m a beginner, and I wasn’t charging him much for it anyway. I used a bit of leftover royal icing to stick on the cap and scroll to finish it off.

So here it is, my first paid cake decorating job! Terese loved it, and the cake tasted fantastic. Unfortunately I had to put Mum and Dad’s anniversary cake on hold to do it because I started getting super-stressed… I was scared I wouldn’t be able to finish them both in the one week, so I called my parents and asked them would they mind if I postponed working on their cake until after Terese’s was done. Oh, and I had a job interview this morning too… icing and decorating donuts for Donut King at Glendale. It’s an early morning job, but we could make it work. Just waiting to hear back from them now, but it sounded REALLY promising. Fingers crossed!!!
Sunday, October 4, 2009
Progress Report
I've just about finished all the roses and leaves for Mum & Dad's anniversary cake, as well as a bucket-load of little 'baby's breath' filler flowers. They were fiddly little buggers of things to make, but it will definitely be worth it. I wasn't happy at all with the batch of flower paste I made for this cake, as it was very stiff and dry, and the gelatine mustn't have mixed through properly because it was riddled with little lumps. I persevered anyway because I didn't have time to start again, but once I got on a roll I managed to turn out some reasonable buds and roses.
I've also been writing down my start-and-finish times and the before-and-after weights of paste as I've worked on the flowers and leaves so I can keep working on my statistics to figure out material costs and time taken. After I finish Mum and Dad's cake I'm planning to make up some rose sprays and put them on ebay, so I can hopefully start making some money back to cover some of my start-up costs.
I've also been writing down my start-and-finish times and the before-and-after weights of paste as I've worked on the flowers and leaves so I can keep working on my statistics to figure out material costs and time taken. After I finish Mum and Dad's cake I'm planning to make up some rose sprays and put them on ebay, so I can hopefully start making some money back to cover some of my start-up costs.
Saturday, September 26, 2009
Next Project...
I have officially started work on my next major cake decorating project. My parents celebrate forty years of marriage in around two weeks, and I offered a while back to make them a cake for their anniversary. They aren’t big anniversary celebrators, but even though they aren’t having a party or doing anything special, I offered to make them a cake anyway because I knew I’d be finished my beginner course by then and it would give me some extra practice. After all, it’s far more rewarding to decorate a real cake for a real occasion than to practise on a dummy then scrape it all into the garbage.
All I’ve done so far is make up a new batch of flower paste. The paste we made in class was basically made from royal icing mix with a bit of cellogen and copha added, but today I used the recipe from my cake decorating book. This recipe used icing sugar, egg white, copha, gelatine and glucose. It’s supposed to have gum tragacanth in it, but we were told in class that cellogen is a cheaper substitute, so I hope it works! The mixture was incredibly dry at first, but I was determined to see if it could be kneaded together before I added any more liquid. I couldn’t believe it… with enough time and elbow grease, the bowl of crumbly white stuff actually came together into a stiff but pliable dough.
I also decided tonight that I had better start keeping proper records of how much things are costing me to make, and how long they are taking me to do. I’m hoping to turn my cake decorating into a hobby-scale home business, so I want to get myself into the habit of costing jobs as I go, even if I’m not being paid to do them. Tonight I made a dozen rose centres from the pink paste that I have left over from my class cake as the first stage of determining my costs. I know, it’s going to be slow and painstaking, but hey, how else are you supposed to figure out what to charge and how much money you’re making!
Wednesday, September 23, 2009
Happy Birthday Rohan!
I've finished Rohan's birthday cake... I know, it looks a little sad backing up from the fully iced and decorated cake I did in my class, but it's what the birthday boy wanted. The cream cheese icing turned out fairly soft, so I didn't end up trying to do any piping. I took the photo as soon as I finished putting on the walnuts, because I had visions of the beautifully crusted sides sliding off if the cake stayed out of the fridge any longer than it had to. But even so, it held up better than expected and it tasted incredible.
 I would also like to take the opportunity to thank Rohan for all the support he's given me as my life enters this new chapter. From looking after the kids while I'm at classes and keeping them out of my hair when I'm working on cakes, to rescuing me from meltdowns and helping me come up with alternative ideas when things haven't gone according to plan, he's been there for me. Money has been tight lately, but Rohan has still encouraged me to follow my dream. Happy Birthday, my wonderful husband... love you heaps.
 I would also like to take the opportunity to thank Rohan for all the support he's given me as my life enters this new chapter. From looking after the kids while I'm at classes and keeping them out of my hair when I'm working on cakes, to rescuing me from meltdowns and helping me come up with alternative ideas when things haven't gone according to plan, he's been there for me. Money has been tight lately, but Rohan has still encouraged me to follow my dream. Happy Birthday, my wonderful husband... love you heaps.
Fourth & Final Beginner Class
Ta-da!!! My beginner course is over and the cake is finished. Marilyn was impressed with my finished cake... she even asked me if I was actually making it for someone! The arrangement might have been a little ambitious for a first attempt at wiring sugar flowers, but if you don’t look at it too closely, you won’t notice all the chipped petal edges and calyxes with points busted off. A valuable tip from Marilyn… yes, for realism, the fuller the flower the more the calyxes should be curled back, but until you’ve had more practice at wiring, just stick them down!
 The arrangement is more ‘open’ than I wanted it to be, but I was putting the flowers as close together as I could manage without them knocking together too much. Apparently I used thicker wire for the roses than I was supposed to, so it was difficult to adjust the positions once they were taped together. After a bit of investigation I found that it was the instructions for making roses in my cake decorating book that said to use 18 gauge wire. According to Marilyn I was supposed to have used 22 gauge… oops.
 All in all, the class was an enjoyable experience and a good introduction to cake decorating. It was making the roses that got me hooked… there was something amazing about watching a flat cut-out piece of icing come to life in my hands. Marilyn has talked about doing some Christmas themed classes next term, so I’m definitely going to keep an eye out for the next course catalogue. Now, could someone please pass me a knife?
Tuesday, September 22, 2009
Carrot Cake
I'm taking a brief time-out from focussing on my course and baking a carrot cake today for Rohan's birthday tomorrow, using the recipe from my cake decorating book. When I asked him a while ago what he wanted for his birthday cake, he replied without hesitation... carrot cake with cream cheese icing. No complaints from me, it's one of my all-time favourite cakes too! I think I'll coat the whole cake with icing and press chopped walnuts around the outside, then if there's enough icing left, I'll see what I can do with some piping.
Monday, September 21, 2009
Almost There...
It worked!!! After all the stressing about what to pipe on my cake and almost giving up doing anything but a shell border (I would rather have put my gorgeous roses on a plain cake than a piped one if the piping was going to be crappy), piping the fine pink lines over the white scrolls worked perfectly. Only one note to self: if doing star nozzle work first then putting leftovers through a fine nozzle, thin down the icing! My hands were aching so much from having to squeeze the piping bag so hard that by the end of the border, I could only do three or four loops at a time without taking a break.
.JPG)
I picked out the best pair of wings and the best body for each of the three butterfly sizes and "glued" them onto the cake with some cellogen glue mixed with a little icing sugar. Once they were dry, I very nervously piped the antennae directly onto the cake. So all the piping was finished last night, and today I dusted and steamed the rest of the flowers and leaves that I made during the week... everything is now ready for tomorrow night. I'm sorry the photo is a little glary, but I had to use the flash. I normally don't, but it was such a dreary, overcast day today that there wasn't enough light, and the ones without the flash looked like they were taken in a dungeon.
Sunday, September 20, 2009
Still More Homework
I’m slowly working my way through everything I need to get done before the final session of my beginner course on Tuesday. I’ve made another dozen roses and a few more leaves since finishing the last lot (they still need to be dusted and steamed), which should give me plenty to play with for flower arranging. I also spent a bit of time practicing my piping and figuring out how I’m actually going to decorate my cake.
My original design idea was to have two hearts on one side of the cake and a flower spray wrapping around the other side and trailing over the front (a potential Valentine or engagement cake). I found a great video on You Tube for piping a scroll border, and I thought of using the scroll idea to make hearts. I did really well with piping the scrolls freehand, but as soon as I tried to follow the outline of the heart, it just didn’t happen for me. I briefly toyed with the idea of doing the actual border from the video, but after a couple of pathetic attempts, I knew I wouldn’t have enough time to practise.
I really wanted to do something with the scrolls because it’s about the fanciest thing I’ve managed to successfully pipe so far, and it was actually Rohan’s idea to make butterflies from back-to-back scrolls. I’m still not confident enough to pipe them directly onto the cake, so Rohan whipped up a template for me (he’s better with computer graphics stuff then me!) and I’ve piped eight sets of wings and four bodies for each of three different sizes.
One more touch of fanciness that I’m hoping I can pull off successfully is piping over the shell border and outlining the butterfly wings with the fine nozzle and a deeper pink icing. On one of my many inspiration-seeking random searches for cake images, I’ve seen quite a few cakes that have shell borders with scallops piped over them in a contrasting colour, and I absolutely love the effect. I’ll end up with the soft pink fondant background, a white shell border and butterfly wings, and the darker pink over-piping for extra contrast. Here’s hoping it all comes together!
Thursday, September 17, 2009
Done and Dusted!
I've just finished a marathon petal-dusting and steaming session to completely finish off the first 12 roses and 18 leaves for my class cake. I brushed the leaves with moss green and blended aubergine around the edges, and then I coloured the edges of the rose petals with plum. I couldn’t believe the transformation... what a difference a bit of shading with a little petal dust makes! I thought my roses looked good before, now they look absolutely amazing and more life-like than ever!
.JPG) I’d tried a bit of dusting on a couple of my practice roses and leaves and had steamed them over the kettle, but for a mass steaming session I thought I’d better put a saucepan of water on the stove. After a bit of experimenting, the best way I found to do it was to have the water at a rolling boil with the lid on, which gave me a decent jet from the steam vent. Yet another transformation, the dried flower paste goes from looking flat and chalky to a glossy, porcelain-like finish. They don’t keep much of the gloss once the steam dries, but they still look beautiful. All-in-all, I couldn’t be happier with my first batch of completed roses and leaves. For a beginner, I think they look AWESOME!!!
I’d tried a bit of dusting on a couple of my practice roses and leaves and had steamed them over the kettle, but for a mass steaming session I thought I’d better put a saucepan of water on the stove. After a bit of experimenting, the best way I found to do it was to have the water at a rolling boil with the lid on, which gave me a decent jet from the steam vent. Yet another transformation, the dried flower paste goes from looking flat and chalky to a glossy, porcelain-like finish. They don’t keep much of the gloss once the steam dries, but they still look beautiful. All-in-all, I couldn’t be happier with my first batch of completed roses and leaves. For a beginner, I think they look AWESOME!!!
.JPG)
Let's try that again...
I decided to take the plunge and re-cover my cake last night. The covering job I did in class was terrible, and I had also since decided that a pale pink fondant would have looked nicer with my roses than putting them on a stark white background. I kneaded an extra 100g or so of icing sugar into the kilo of Orchard fondant that I still had left, and coloured it a super-soft baby pink.
Then I had hassles with the fondant sticking to the bench when rolling, even though I had dusted with icing sugar. I gathered it all up and rolled it out again, using more icing sugar then the first time, but a big patch in the middle still flatly refused to lift off the bench. In the end I got around it by rolling out the fondant about half-way, and folding back first one side then the other, and sprinkling extra icing sugar under the middle section. Finally, success!
.JPG)
The firmer fondant was definitely easier to lift up and over the cake. There were still a few tiny stretch marks (nothing that a bit more practice won’t fix, I hope!), and being done at home in my own clean kitchen rather than in a high school science classroom, there were no dust issues. Oh, and I also cut my fingernails super-short to avoid digging them into the icing. Overall it looks a thousand percent better than it did before… I’m so stoked with how well my roses are turning out, I just couldn’t have lived with putting them on such a crappy looking cake.
Wednesday, September 16, 2009
Third Beginner Class
In last night’s class, we covered our cakes with fondant. Marilyn got us use two layers of fondant instead of marzipan then fondant, because “some people don’t like marzipan.” Personally I don’t mind marzipan, and I will be using it in future, unless the cake is for a customer that doesn’t want it. In keeping with my ‘homemade tastes best’ philosophy I also plan to make all of my own icings, but for the purpose of the class, I bought the Orchard ready to roll icing.
.JPG) Now I’ve never covered a cake in fondant before, but I’ve watched several videos on You Tube, and to me the Orchard icing seemed WAY too soft. It was impossible to move the rolled icing onto the cake without it pulling and stretching under its own weight, and the finished result wasn’t the greatest. The photo doesn't really show it that well, but it's full of dust specks, fingernail scratches and ‘stretch marks.’ And looking at it again this morning in natural daylight, it looks even worse than I thought it was. I’m so disappointed with it, I’m seriously considering covering it again with another layer.
Now I’ve never covered a cake in fondant before, but I’ve watched several videos on You Tube, and to me the Orchard icing seemed WAY too soft. It was impossible to move the rolled icing onto the cake without it pulling and stretching under its own weight, and the finished result wasn’t the greatest. The photo doesn't really show it that well, but it's full of dust specks, fingernail scratches and ‘stretch marks.’ And looking at it again this morning in natural daylight, it looks even worse than I thought it was. I’m so disappointed with it, I’m seriously considering covering it again with another layer.
.JPG)
Monday, September 14, 2009
Roses Galore!
I’ve now made a dozen roses with the pink flower paste that I coloured last week, half each with my two different sized cutters. With each cutter, I’ve made two each of bud, medium, and full roses. Before I made these ones, I revisited the Expert Village ‘How To Make Sugar Gum Paste Flowers’ demonstration series on You Tube and decided to use this method, as the arrangement of the petals are more like that of a real rose than the ‘quick rose’ method we were shown in class. (And yes, the tripod makes the WORLD of difference!)
.JPG)
I’m still getting better at making roses with every batch I do. Even the few little mistakes I’ve made aren’t overly noticeable, and it’s all part of the learning curve to figure out what I did wrong and make sure I do it better next time. The main thing is that I’m absolutely loving making them, and the more I make and the more confident I feel, the more I figure out my own little ‘ways’ of doing things. I also have a grooved rolling pin now, so I had a bit of a play with making a few leaves today too.
Friday, September 11, 2009
Colour Mixing
Last night’s project was to do a little experimenting with colour mixing. The eight colour Wilton set that I bought before I made Cameron’s birthday cake has red, yellow, blue, green, purple, pink, ivory and black gels. The colours are all very ‘pure’ and not the greatest for realistic looking flowers, but that’s what colour wheels are for! I should (theoretically, at least!) be able to mix any colour of the rainbow from that basic set.
First up was my little ball of bright green paste. I went out and nabbed a couple of rose leaves from the garden to use as a colour reference, and my first thought was to add some black to darken it. I only added a tiny dot to see what would happen, and although it didn’t darken a great deal, it definitely took the candy-brightness out of the colour. Next I added a little blue, which definitely brought it to a far more natural looking ‘rose-leaf-ish’ green. Overall it was still too light a shade, but at least I know that the colour combination works, so it’s a good starting point.
Next up was to colour the bulk paste for the rest of my roses. Now, anyone that knows me well enough would know that I’m a sucker for pink roses, so it’s a bit of a no-brainer that I’ll be making pink roses for my cake. Once again, the Wilton colours are too ‘pure’ and I don’t particularly want ‘fairy floss pink,’ so my idea was to use mostly pink with a little purple and red to take it more towards a plum-pink.
I took about two thirds of my remaining uncoloured paste, and made what turned out to be a brilliant guesstimate of how much pink gel to add. Once I had it kneaded through enough to see that it was spot-on for the depth of colour I wanted, I added a little purple. The purple did a similar thing to the pink as the black did to the green, taking away some of the brightness and turning it into more of a dusty pink. A touch of red (and a LOT of kneading!) then brought it to the colour I had in mind.
Thursday, September 10, 2009
More Homework
I made three more ‘practise’ roses last night. I used my smaller cutter for the ones I made in class, so I still had the three bigger cones left. If I was happy with the first roses I made, then I was STOKED with the second group! I’ve watched a few different instructional videos on You Tube for how to make sugar roses in the lead-up to doing this course, and they all had slightly different methods. For these three roses, I basically ‘went my own way’ using a bunch of different hints from different sources, and managed to turn out (in my opinion, at least) some pretty impressive looking roses. I just wish I could take a photo that would do them justice… somehow I think I’m going to have to dig out the tripod.
.JPG)
Marilyn thought my flower paste seemed a bit soft the other night, so I’ve been dusting with a LOT of cornflour so far. I’m happy enough now with my rose-making ability that I’m done practising, so I’ve kneaded some extra icing sugar and a little more cellogen into the rest of my paste to firm it up a bit, and the next roses I make will be destined to adorn my finished cake.
Leaves, on the other hand, still need some more work. I didn’t like the way we were shown in class compared to other methods I’ve seen, so I’m not trying them again until I go back to Cupid’s and get myself a grooved rolling pin. Last night I added some more green colouring to the rest of the rather wimpy green paste I ended up with in class (we were all just given a dab of colouring onto a ball of paste, and mine came out barely even noticeably green) to make the calyxes for these roses. I only have the basic Wilton gel colours so it’s a very ‘pure’ green and looks a bit silly, but I’m going to experiment with some colour mixing and use the rest of it to try some more leaves at a later date.
Tuesday, September 8, 2009
Second Beginner Class
.JPG)
Sunday, September 6, 2009
Good Old Collingwood Forever!
.JPG)
Most times I’ve seen recipes for ganache, it’s been equal grams of chocolate to milliletres of cream. This apparently doesn’t work for white chocolate, which I found out the hard way last night. Even after putting it in the fridge to cool, it still hardly even thickened at all, and was so thin it just dripped right off the cake. Having no more white chocolate left meant that remaking the ganache was out of the question, so with Rohan’s help I scooped up as much of the puddle as I could. We put the cake in the fridge, and the rescued ganache in the freezer to see if it would thicken up any more when properly cold.
Now… chocolate (yes, even white chocolate) is solid at room temperature, and you can freeze cream to make icecream. So why does a molten mixture of the two not even go remotely firm in the freezer??? I kept leaving it and leaving it, until it got to a point where it had barely become a spreadable consistency and just wasn’t getting any thicker any more.
Eventually, though, I had the brainwave that saved my cake… icing sugar. I added enough icing sugar to the miserable excuse for ganache to turn it into a makeshift white chocolate icing. There was only enough for the top of the cake, but I still had some cream and dark chocolate left, so I decided to finish the cake top and call it a night, then make some dark ganache to attach the chocolate strips to the sides in the morning. I covered the top of the cake, then nervously lifted the magpie off the plastic sleeve and onto its new nest of white chocolate icing.
This morning I made up some dark ganache using the same proportions in the recipe from my chocolate class notes (two parts chocolate to one part cream), because I’ve made it before and I know it works! Still, that didn’t prevent a couple more mistakes before it was all over. I pulled the cake straight from the fridge and started spreading the sides with ganache (which had also been in and out of the fridge and microwave at least once each to get the consistency right), only to have it set so quickly on the cold cake that the chocolate strips wouldn’t stick. Not to mention that something had gone wrong somewhere with measuring the cutout strips, as the dark chocolate ones were too long.
So after trimming the dark strips to the same length as the white ones (which were thankfully spot-on) and the cake had been out of the fridge for a while, I then basically used the remaining ganache to ‘glue’ the chocolate strips in place. Finally, my Collingwood cake was finished… not exactly by the method I had intended, but as I said, ‘all’s well that ends well.’ It still looks fantastic, just the way I’d planned it.
(Just a footnote… Dad loved the decorating job, and the white mud cake tasted amazing. The ‘white chocolate icing’ turned out to be really nice, although it was still soft at fridge temperature. Unfortunately Collingwood lost their game today, but the cake was definitely a winner!)
Saturday, September 5, 2009
'Black & White' Stripes
.JPG)
Compared to making the run-out magpie, the 'black and white stripes' were relatively straightforward to make. I melted both dark and white chocolate and spread them out on baking paper that was taped to a large cutting board. I put the whole board in the fridge until the chocolate was almost set, then used a sharp knife to score the chocolate into strips.
Chocolate Magpie
Even as I wrote my blog entry about last night’s homework, I had a white chocolate mud cake in the oven. My dad and I come from a long line of Collingwood supporters, their first finals game is on Father’s Day, I bake for get-togethers where possible, I had a white mud cake recipe I wanted to try, and I still haven’t done any more chocolate decorating since my class. Add all that up and what do you get? Make a white mud cake, decorate it in a Collingwood theme and take it up to my parents place when we go for Fathers Day lunch tomorrow!
.JPG) The plan is to cover the cake in white ganache and decorate it with a run-out chocolate magpie on top and strips of dark and white chocolate around the outside. This is the magpie pattern, 'borrowed' from a logo on the Collingwood Football Club web site. I re-sized the picture to suit the cake, put the print-out in a plastic sleeve, and taped it to a board for extra stability. I put a smear of copha over the actual design, then started melting chocolate.
The plan is to cover the cake in white ganache and decorate it with a run-out chocolate magpie on top and strips of dark and white chocolate around the outside. This is the magpie pattern, 'borrowed' from a logo on the Collingwood Football Club web site. I re-sized the picture to suit the cake, put the print-out in a plastic sleeve, and taped it to a board for extra stability. I put a smear of copha over the actual design, then started melting chocolate.
.JPG) I had a bad feeling that I might end up regretting doing something so big and complex for my first ever chocolate runout. As it is, this was my second attempt. I learned fairly quickly that you can't just fill in the outline by squirting chocolate willy-nilly and expecting to smooth it out with a toothpick. It didn't look too bad until it came out of the fridge. It was horribly obvious then just how uneven the thickness of the chocolate was. I let it soften a little and tried to smooth out some of the lumps, and therefore learned my next lesson that the chocolate loses its sheen if you try to play around with it once it sets. Then I tried to spread more chocolate over the top to patch it up, which turned out to be a futile exercise, as the harder I tried to fix it, the worse it looked. In the end there was nothing else that could be done but melt it down and try again, keeping the lessons learned in mind.
I had a bad feeling that I might end up regretting doing something so big and complex for my first ever chocolate runout. As it is, this was my second attempt. I learned fairly quickly that you can't just fill in the outline by squirting chocolate willy-nilly and expecting to smooth it out with a toothpick. It didn't look too bad until it came out of the fridge. It was horribly obvious then just how uneven the thickness of the chocolate was. I let it soften a little and tried to smooth out some of the lumps, and therefore learned my next lesson that the chocolate loses its sheen if you try to play around with it once it sets. Then I tried to spread more chocolate over the top to patch it up, which turned out to be a futile exercise, as the harder I tried to fix it, the worse it looked. In the end there was nothing else that could be done but melt it down and try again, keeping the lessons learned in mind.
.JPG) The second attempt turned out MUCH better. With the dark chocolate done, it was fairly easy to go back and fill in the gaps with a little bit of white chocolate. As usual, I'm not a hundred percent happy with it. This time I filled in the runout by piping lines close together, and even though it doesn't show so much on the photo, there are still some obvious piping 'ridges' when you look at it up close. But, this is already the second attempt, and I simply don't have time to try for a third.
The second attempt turned out MUCH better. With the dark chocolate done, it was fairly easy to go back and fill in the gaps with a little bit of white chocolate. As usual, I'm not a hundred percent happy with it. This time I filled in the runout by piping lines close together, and even though it doesn't show so much on the photo, there are still some obvious piping 'ridges' when you look at it up close. But, this is already the second attempt, and I simply don't have time to try for a third.
.JPG)
.JPG)
.JPG)
Homework
I did a bit of ‘homework’ for my course last night. I made half a dozen rose centres, and practiced piping shell borders with the royal icing I had left over from Tuesday. And I can add another hint to my list of tips for dealing with warm hands… don’t have a cup of tea when you’re getting ready to pipe. I only though of this when that nice warm flush came over me just as I finished my cuppa, and therefore I decided to do the rose centres first!
I have two different sized rose cutters now, so I made three centres for each cutter size. I measured them against the petals of the cutter so I think I have the length right, my only concern is that I may have made the too ‘fat.’ Time will tell… we’re learning to make the sugar roses and leaves in the next class. Sorry the photo is a little blurry, but hey, I’m not learning to be a photographer!
.JPG) My second project for the night was to add some more icing sugar to my leftover royal icing and practice shell borders again. The shells definitely held their shape better, but I’m not sure if I might have made it too thick this time. I’m definitely better at it since the class, but I’m still struggling for consistency. Every time I went ‘wow, that one’s perfect!’ the next one was crap.
My second project for the night was to add some more icing sugar to my leftover royal icing and practice shell borders again. The shells definitely held their shape better, but I’m not sure if I might have made it too thick this time. I’m definitely better at it since the class, but I’m still struggling for consistency. Every time I went ‘wow, that one’s perfect!’ the next one was crap.
.JPG)
I have two different sized rose cutters now, so I made three centres for each cutter size. I measured them against the petals of the cutter so I think I have the length right, my only concern is that I may have made the too ‘fat.’ Time will tell… we’re learning to make the sugar roses and leaves in the next class. Sorry the photo is a little blurry, but hey, I’m not learning to be a photographer!
.JPG)
.JPG)
I also suspect that I might have put too much icing in the bag. I deliberately loaded it up because I wanted a decent practice session, but that also meant that the ‘warm hands’ factor didn’t really kick in until towards the end when my hands were actually around the narrower end of the bag. I think I’m just going to have to practise with smaller amounts that are more like what you would realistically put in a bag to do an actual border on a cake, and take my fine-tuning from there.
Wednesday, September 2, 2009
First Beginner Class
I’m really happy with my piping progress, even from the little bit of practice in the class last night. No matter how many books you read and instructional videos you watch, nothing compares to having an experienced teacher on hand to answer questions, watch what you’re doing, and help you correct your mistakes. Nor can any book tell any individual person that their hands are unusually warm and that they may need to make their royal icing a little thicker than usual.
I hadn’t been doing too badly with a plain nozzle and straight lines (I think the problems I had with the gingerbread men were more a factor of going freehand with paper bags and no nozzles), but I’ve always struggled any time I’ve attempted a shell border. I asked Marilyn for some help, she took my piping bag, and immediately exclaimed that I must have very warm hands. She checked the consistency of everyone’s icing to make sure it was stiff enough before we started piping, but my shells were collapsing and losing detail. Or maybe my piping bag just felt overly warm to her, I’m not sure. Anyway, she suggested I might need to add a little extra sugar to compensate for the icing softening in my hands.
When I piped the buttercream on Cameron’s birthday cake, I found that by the time I went through a bag, the cream was melting and oils starting to separate out of the butter. Well, body temperature is warmer that room temperature, so I figured this must happen to everyone. And with my previous shell attempts, I assumed that I just hadn’t figured out the right icing consistency yet. I did a little net surfing this morning and found a few hints… wearing cooler clothing (bugger, I hate being cold!), running your hands under cold water occasionally, and working with multiple bags and rotating them in and out of the fridge seemed to be the most helpful suggestions.
So, back to my shell border problem. I’ve been trying to form the tails by gradually easing the pressure on the bag as I pull away from the shell. Wrong! The way the teacher showed me was to stop the pressure completely then drag the nozzle away to stretch the icing out into a tail. Collapsing shells from warm icing aside, the rest of my shell border practice for the night looked a hundred percent better than it had before being shown properly. I have some icing left over, so some time in the next few days I’m going to add some more sugar to it and give the shells another try.
Tuesday, September 1, 2009
Spring has sprung!
September is here, it’s a beautiful day, and I have the first session of my Beginner’s Cake Decorating class this evening. A great way to start a new month, considering how all of my baking plans for late August spiraled into a dismal black hole. I had two projects planned for last week, and when one fell through I planned another, but coming down with a cold on Thursday night was the death knell for all of them.
I was going to bake and decorate a flourless chocolate cake for D&D on Friday night, and do some fondant-covered cupcakes for a picnic on Sunday. First the picnic was postponed by a month. That freed up Saturday, so I offered to make a mud cake for Rohan to take to his other D&D group (no gluten issues there!) on Saturday night. I made some chocolate roses and leaves on Wednesday night as planned, but Thursday was a disaster waiting to happen.
I had a lousy night’s sleep on Wednesday night, and on Thursday I was so tired and useless, it took until late in the afternoon to even get the cake cooked. The kids had been sick with colds since Sunday, and by Thursday evening I could feel it was getting to me as well. I abandoned plans to decorate the cake that night, having already decided not to go to playgroup in the morning. But I woke up on Friday with a full-blown cold and had to cancel D&D anyway.
So that was the end of that. The flourless chocolate cake was actually quite nice (very rich, much like a mud cake texture), but it didn’t end up getting decorated. I still felt lousy on Saturday, so I didn’t even attempt to make the mud cake for Rohan either. All in all, it was a rather disastrous week. Anyway, August is over, it’s a brand new month, and I’m looking forward to learning some new tricks at my class tonight.
Friday, August 21, 2009
All Dressed Up
I walked to playgroup today, two kids in the double stroller and sixteen gingerbread passengers in a container underneath. It’s the first time in months that I’ve walked any distance with the stroller, and even now, I still feel completely buggered. It wasn’t until I was about to get Rebecca’s dinner ready that I realised I still haven’t posted photos of the finished gingerbread people. So here they are (or should I say, as they were… they’ve all been eaten now!) dressed up and ready for playgroup…
.JPG)
.JPG) Okay… if you look at them as an extra-fun morning tea treat for the kids, then they’re great. However, my real reason for making these biscuits was for piping practice. Sure, they might look good at first glance, but if you look at them closely, it’s stating the bleeding obvious to say that I still can’t pipe to save myself.
Okay… if you look at them as an extra-fun morning tea treat for the kids, then they’re great. However, my real reason for making these biscuits was for piping practice. Sure, they might look good at first glance, but if you look at them closely, it’s stating the bleeding obvious to say that I still can’t pipe to save myself.
Rolling dough between two sheets of baking paper, good… using baking paper cones with snipped tips as plain piping bags, BAD. I didn’t like using them at all. I used paper cones for most of Cameron’s birthday cake, but I still slipped piping nozzles inside them. I just couldn’t get consistent lines out of the snipped cones for love nor money. The tip openings seemed to stretch, as the lines became thicker and thicker as time went on. I also sometimes ended up with a “ribbon” instead of a cylindrical line from where the scissors must have squashed the tips flat.
But, piping disasters aside, my gingerbread people were a hit at playgroup. They tasted fantastic, and even though the kids wouldn’t have appreciated how much work had gone into them, the mums certainly did. And we often learn by trial and error… although I seriously can’t see myself doing much more multi-colour piping unless I invest in a bunch of plain nozzles.
.JPG)
.JPG)
Rolling dough between two sheets of baking paper, good… using baking paper cones with snipped tips as plain piping bags, BAD. I didn’t like using them at all. I used paper cones for most of Cameron’s birthday cake, but I still slipped piping nozzles inside them. I just couldn’t get consistent lines out of the snipped cones for love nor money. The tip openings seemed to stretch, as the lines became thicker and thicker as time went on. I also sometimes ended up with a “ribbon” instead of a cylindrical line from where the scissors must have squashed the tips flat.
But, piping disasters aside, my gingerbread people were a hit at playgroup. They tasted fantastic, and even though the kids wouldn’t have appreciated how much work had gone into them, the mums certainly did. And we often learn by trial and error… although I seriously can’t see myself doing much more multi-colour piping unless I invest in a bunch of plain nozzles.
Thursday, August 20, 2009
Gingerbread People
“Run, run, run, as fast as you can... you can’t catch me, I’m the Gingerbread Man!” I can vaguely recall trying to make gingerbread once or twice somewhere in the dim dark past, but not doing what you’d call a spectacular job. Regardless, I’m going to call this my first SUCCESSFUL attempt at making gingerbread people. Piped icing clothes are still to come (and there are actually twice as many as in the photo), but this is what they look like naked…
.JPG) I made a couple of handy discoveries while making these biscuits. The first was just a lucky coincidence that four of them fit rather neatly onto one of my cookie sheets, but the second was a stroke of sheer genius, even if I do say so myself. I’ve always been a fan of rolling out dough between two sheets of baking paper. So today I rolled out a portion of dough, peeled off the top layer of paper, cut out two boys and two girls, and removed the dough trimmings. I looked at the lined tray, then looked at the four dough cut-outs, wondering how I was going to transfer them to the tray without them getting stretched out of shape.
I made a couple of handy discoveries while making these biscuits. The first was just a lucky coincidence that four of them fit rather neatly onto one of my cookie sheets, but the second was a stroke of sheer genius, even if I do say so myself. I’ve always been a fan of rolling out dough between two sheets of baking paper. So today I rolled out a portion of dough, peeled off the top layer of paper, cut out two boys and two girls, and removed the dough trimmings. I looked at the lined tray, then looked at the four dough cut-outs, wondering how I was going to transfer them to the tray without them getting stretched out of shape.
Light bulb moment! The cutouts were already on baking paper, the bottom layer used when rolling out the dough. I simply trimmed the baking paper around the cut-outs and slid the paper, biscuit dough and all, onto the tray. Brilliant! No mess, no fuss, no gingerbread deformities. It worked so well! I now know EXACTLY how I’ll be doing any kind of cut-out biscuits in future.
.JPG)
Light bulb moment! The cutouts were already on baking paper, the bottom layer used when rolling out the dough. I simply trimmed the baking paper around the cut-outs and slid the paper, biscuit dough and all, onto the tray. Brilliant! No mess, no fuss, no gingerbread deformities. It worked so well! I now know EXACTLY how I’ll be doing any kind of cut-out biscuits in future.
Tuesday, August 18, 2009
My First Cupcakes!
Today I baked my first cupcakes ever! I’ve made plenty of muffins, and probably as many mini muffins, but I didn’t even own any cupcake-size tins until two days ago. The cupcakes for the class were supplied by the teacher, so this is the first time I’ve made them myself. I used the same Madeira cake recipe that I made Cameron’s birthday cake from. The quantities for a 6 inch tin gave me a dozen cupcakes, which was a good sized test batch.
I need to do some more hunting for better quality cupcake cases, though. The supermarket only had “cheap and nasty” ones with gaudy prints, and they aren’t even cut straight. I carefully smoothed the batter in each paper case, noticing as I went that when they were sitting flat with the batter nicely leveled, one side of the case sat distinctly higher than the other. The cakes rose perfectly evenly and found their own level, but when you look at them side-on from the right angle, they're obviously deformed. Not a huge issue for the average home baker, I guess, but for someone wanting to do professional quality decorating, they just don’t cut it.
Thankfully this was just a test batch and I never intended to ice or decorate them, because they hadn’t been on the cooling rack more than a minute before I gave in to temptation. Mmmm… fresh cupcakes straight from the oven, still warm and crunchy on top! Whenever I bake muffins, one or two always seem to disappear before they’ve had a chance to cool, but I wouldn’t have had a hot freshly baked cupcake since my mum made them when I was little. Ahhh, childhood memories come flooding back!
Subscribe to:
Posts (Atom)